Creating Invoices in Navigator
On the Create Tab, click Pull Orders to Invoice.
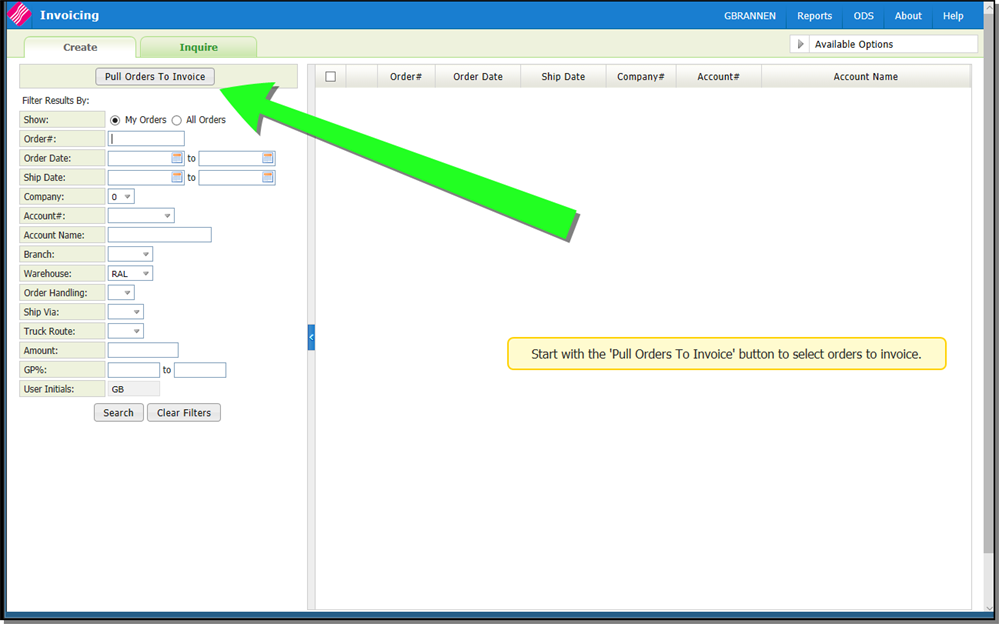
The Pull Orders to Invoice dialog box pops up. Click the drop down arrow and select a method to pull invoices with.
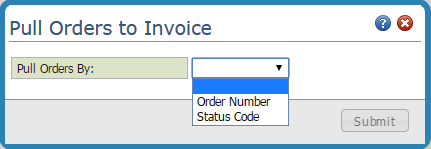
Order Number
This option enters invoices one order at a time. When an order is invoiced using this option, the order's notepad is automatically updated to show who made the change and when and where it was made. This provides a simple way to track who, when and where invoices are created using this method.
If you only need to add one or two orders this option is probably the way to go. Enter an order number to invoice and select to invoice specific lines or invoice the whole order.
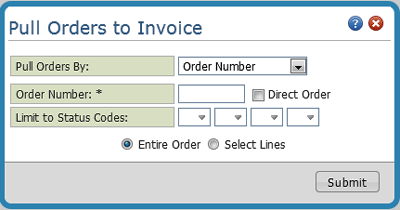
Use the Limit to Status Codes fields to only pre-select lines on the invoice at that particular status code. Some invoices can have several lines and these settings allow you to automatically limit the invoicing to specific lines instead of having to manually select lines.
If Select Lines was selected, the Edit Invoice window appears. Select the lines you want to invoice.
When Entire Order is used, the entire order is invoiced and automatically added to the Pending Invoice table. It will override all statuses. Back orders are omitted.
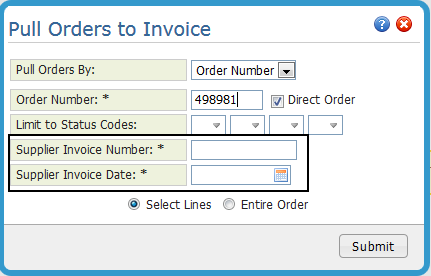
Direct Orders are shipped directly from the supplier to the customer. If Direct Order is selected two new fields appear that allow you to enter the Supplier Invoice Number and Supplier Invoice Date.
Status Code
This option searches for all orders with the status code(s) specified. All lines at the specified status are invoiced, as if each order had been keyed individually. A list of the orders & lines invoiced is created.
This option, when combined with efficient warehouse procedures, can virtually eliminate the Order by Order invoicing function in all wholesale sales environment.
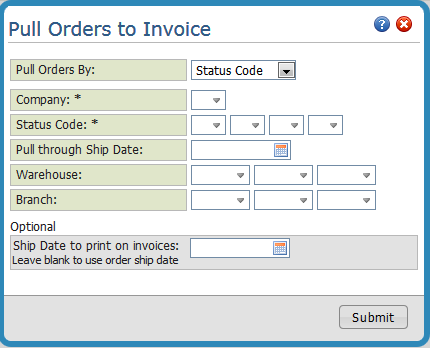
| Field | Description/Instructions |
|---|---|
| Company | Your default company number displays here. Only this company will be invoiced. |
| Enter Status Codes | Enter up to four status codes that indicate a line item can be invoiced. You must enter at least one status code. We recommend that the S Status code (indicating shipped) be used for invoicing by status code. The program automatically invoices only the lines at the status code(s) entered here. |
| Pull Through | Enter a date to pull all orders with the status(es) up to the entered ship date. |
| Warehouse | Enter the header warehouse codes to invoice or leave blank to include all header warehouses. |
| Branch |
Enter the branch codes to invoice or leave this field blank to invoice all branches. This field enables you to run invoices separately at each branch and run invoice batches by company and branch in order to use separate pre-printed forms. Adhere to the following guidelines when printing invoices in a decentralized multi-branch environment:
|
| Pull through | Enter a ship date here only if you want to update the ship date that appears on invoices. This allows you to invoice yesterday's shipments in a 24 hour warehouse environment. If you leave this field blank, the existing ship dates from the Order File are used. |
Click Submit to add orders/lines meeting the selection criteria to the Pending Invoices table and to generate the Price Variance and Invoice by Status Code Reports.
Invoicing by status codes works as follows:
- The program automatically invoices the line items that are at the selected statuses and match your parameter entries. It then prints a list of the orders invoiced. You should proceed only after reviewing this report. The report displays the reasons why an order is not invoiced (i.e., order on credit hold or has not gone through the Close-A-Truck program).
- The invoices are then ready to print and are accessible via the Inquire tab for Today's invoices.
- The program either cancels or leaves open (back orders) any uninvoiced line items on invoiced orders according to the Order Handling Code.
- All point of sale and direct ship invoices are bypassed when invoicing is done by status codes. This prevents duplicate billing when these invoices are accidentally scanned or updated to an S status. Direct ship invoices are bypassed because it requires the user to enter the supplier's invoice number and a date.
- Partially shipped orders that are returned to credit hold status when back orders are filled can be invoiced, even though on credit hold, using this option. The Enter Invoices Program, in which you create invoices one at a time by order number, will not allow you to invoice an order that is currently on credit hold. The Invoice by Status Code Program extracts only the items marked as shipped, and leaves the remaining lines on credit hold. This situation occurs only when a signal order has some lines being invoiced and other lines being back order filled at the same time.
Adding Orders to the Pending Invoices Table
After selecting an invoice pulling option and entering the necessary parameters, click Submit. The orders that meet your criteria are added to the Pending Invoices Table.
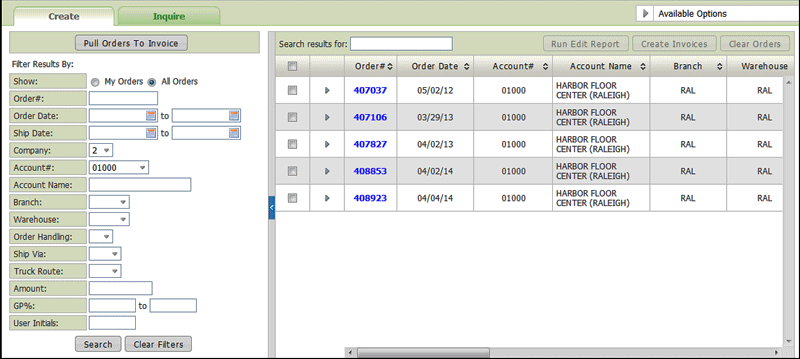
Select the orders you want to invoice and click Create Invoices in the top right hand corner of the table.
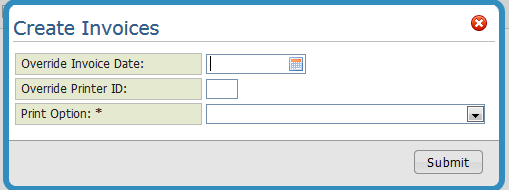
Use the Override Invoice Date and Override Printer ID fields to override the invoice defaults. The default for the invoice date is today's date and the printer default is established on page three of the users Web Control Panel (menu option NAV 5 option Y).
The following Print Options are available:
- Print if forms are loaded and aligned - Use this option if the invoice forms are in the printer and printing can commence immediately.
- Print if forms need to be changed and aligned - This option directs the invoices to a printer, but it doesn't automatically print them. It gives you time to get the invoice forms ready to print. They can then be printed when the printer is ready.
- Create but leave on hold in spool file - This option creates the invoices, but does not print them. Instead the invoices are placed on hold in the spool file. Use this option if you distribute invoices via fax and email.
Click Submit to generate the invoices. The newly created invoices can now be viewed under the Inquire tab.
Associated Files
- Options for Invoices
- Invoicing Pricing & Promotions Pricing ShipBy Analysis Rpt
- Purge Invoice File - SYS 116
- List Salesperson Assignments On Today's Invoices - SYS 302
- Run Invoice Register, Showing If In Balance With Inventory - SYS 309
- Check Order, Invoice, & Reference Number Wheels - SYS 804
- Tax Audit Inquiry by Invoice Number - SYS 909
- Warehouse Invoicing
- Invoicing
- Recurring Invoices - Menu IVR
